Fabric 原生组件:iOS
现在是时候编写一些 iOS 平台代码以渲染 Web 视图了。你需要遵循以下步骤:
- 运行 Codegen。
- 编写
RCTWebView的代码。 - 在程序中注册
RCTWebView。
1. 运行 Codegen
你可以 手动运行 Codegen,但更简单的方法是使用你打算演示组件的应用程序来帮你运行。
cd ios
bundle install
bundle exec pod install
重要的是你会看到 Codegen 的日志输出,我们稍后会在 Xcode 中使用它来构建我们的 WebView 原生组件。
你在提交生成代码到仓库时需要小心。生成代码是针对每个 React Native 版本特有的。请使用 npm 的 peerDependencies 来限制与 React Native 版本的兼容性。
3. 编写 RCTWebView
我们需要通过完成以下 5 个步骤 使用 Xcode 准备你的 iOS 项目:
- 打开 CocoaPods 生成的 Xcode Workspace:
cd ios
open Demo.xcworkspace
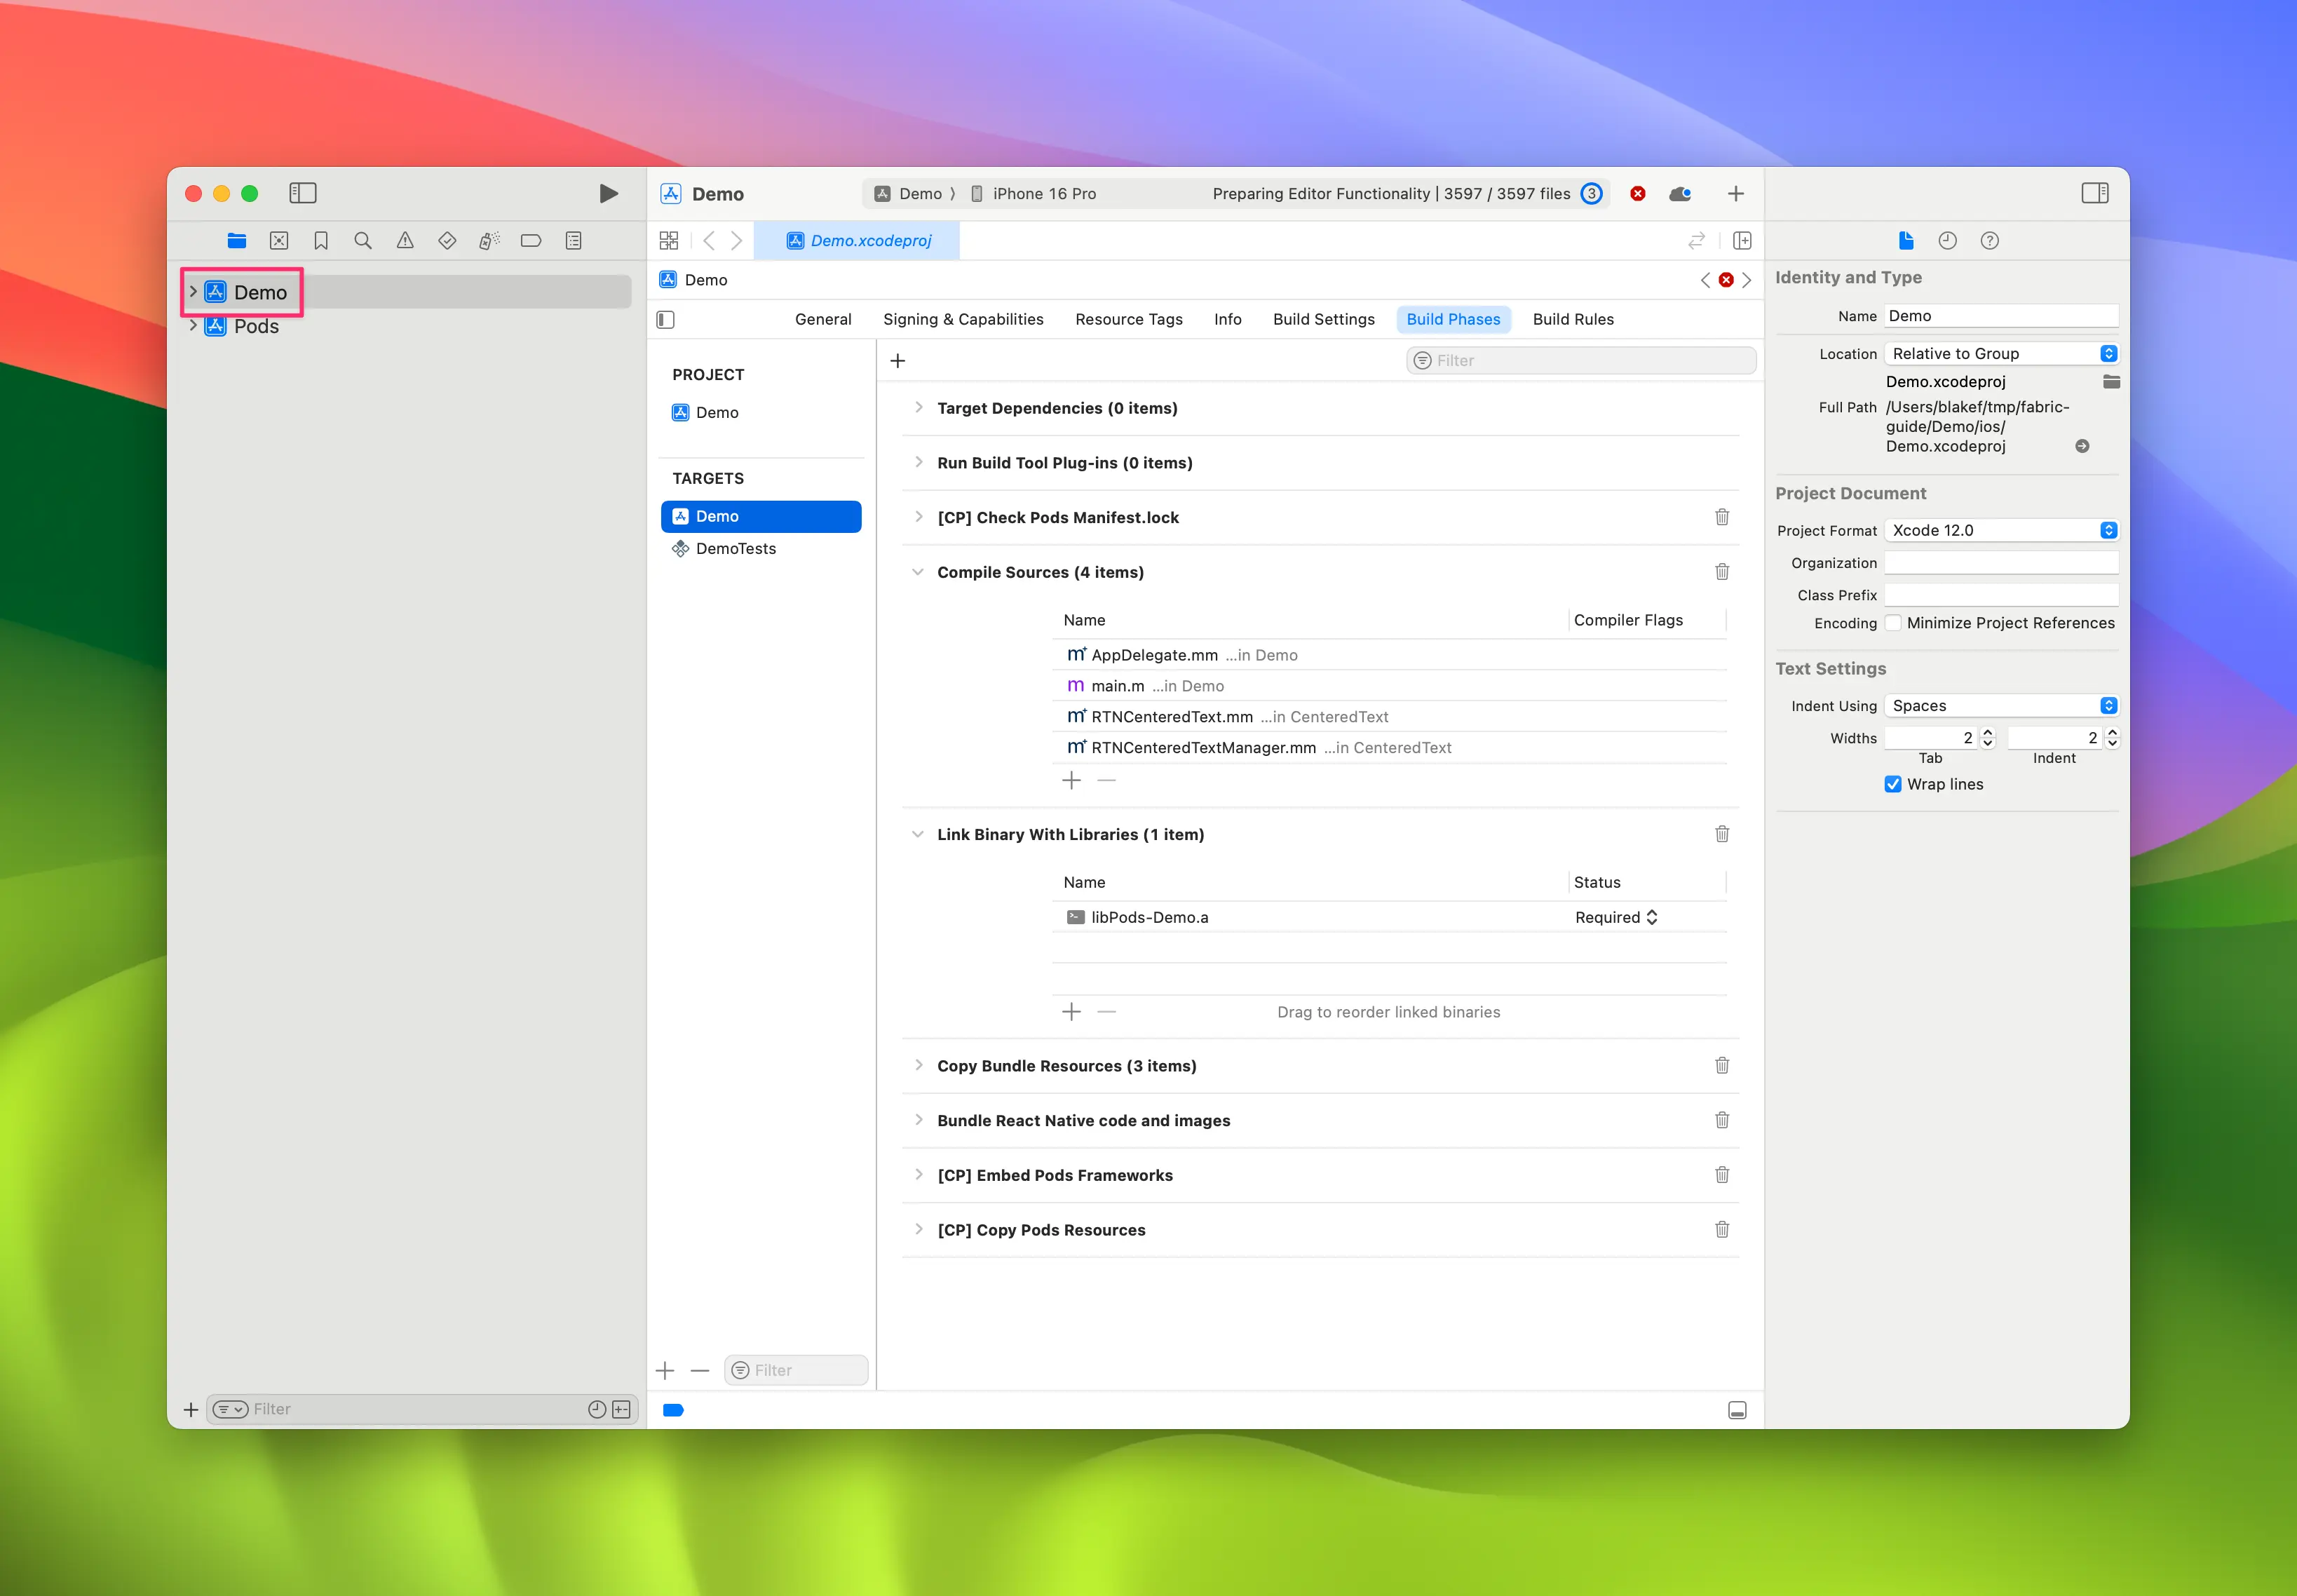
- 右击 app,然后选择
New Group,将新组命名为WebView。

- 在
WebView组内,创建New→File from Template。
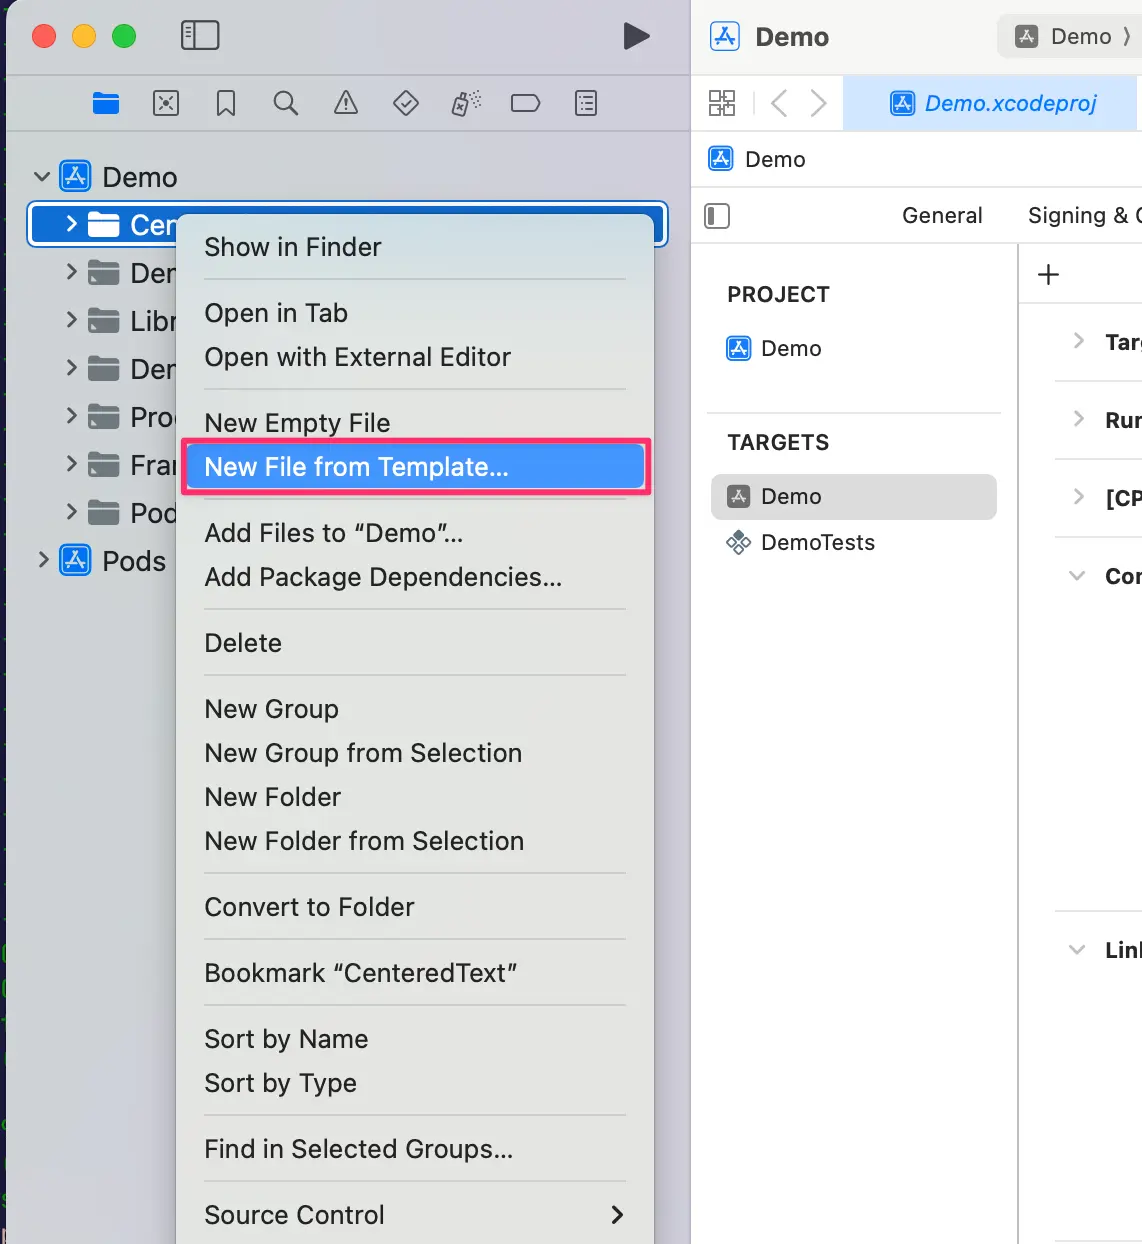
- 选择
Objective-C File模板,并命名为RCTWebView。
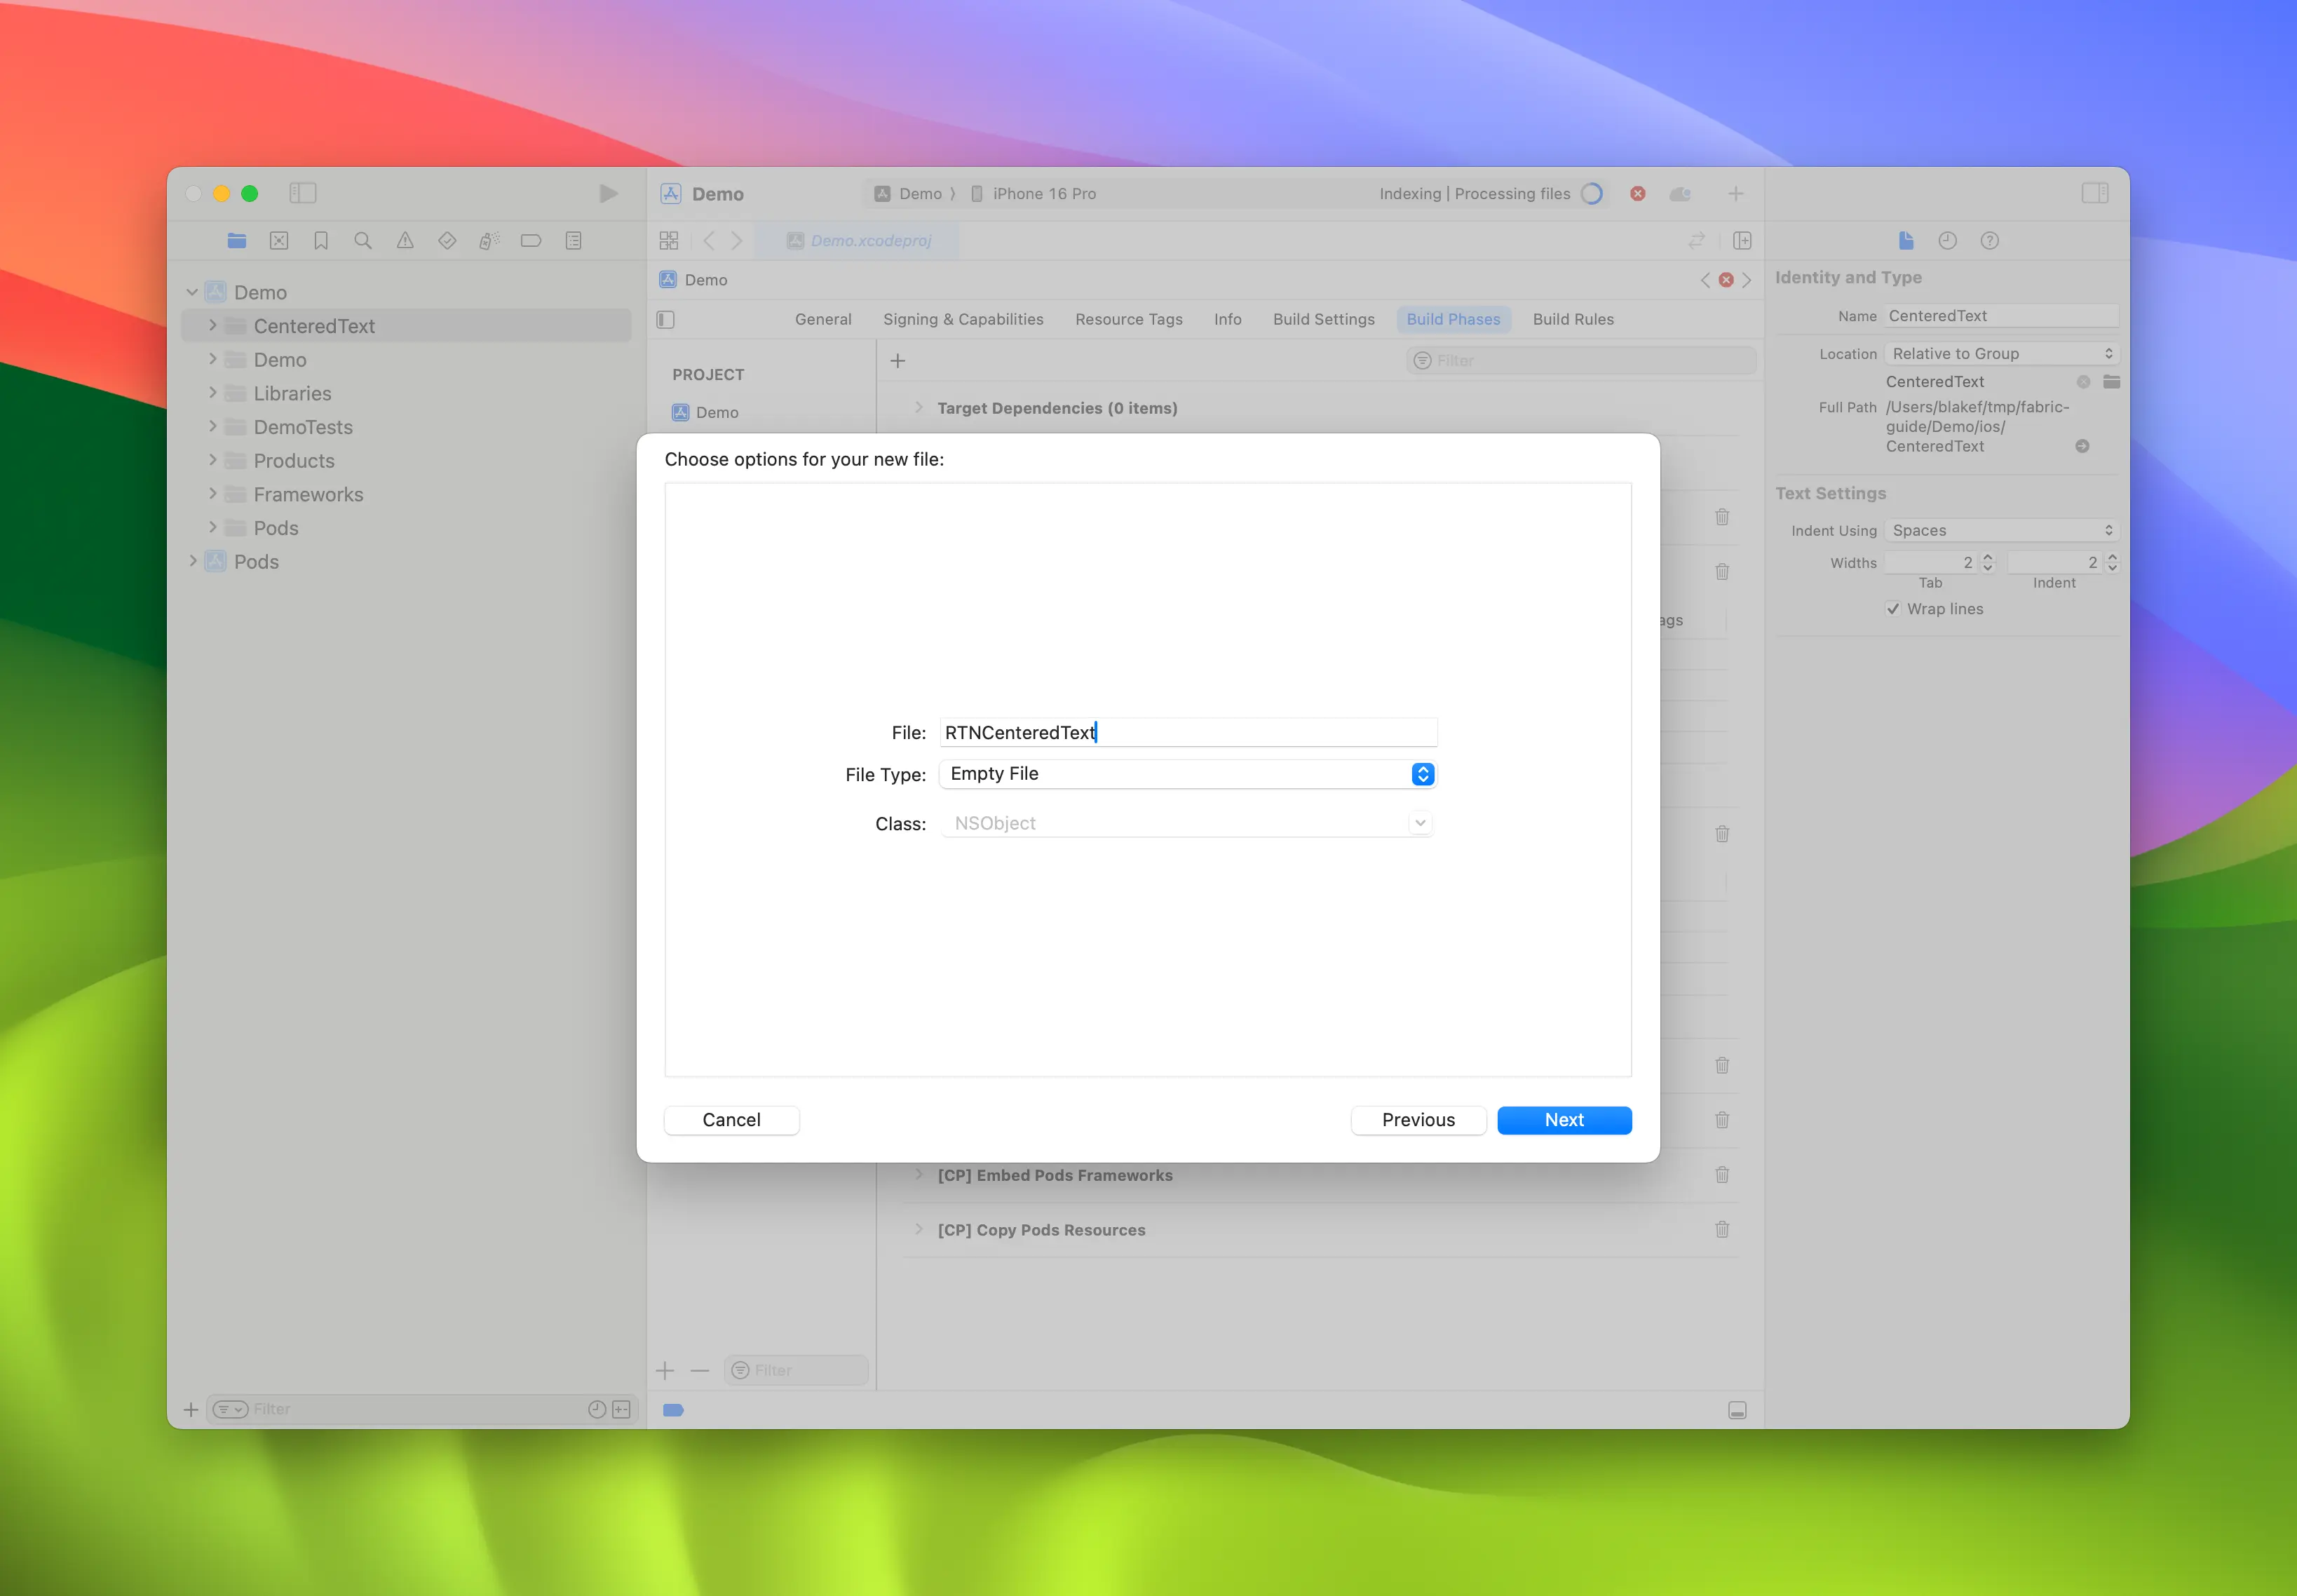
-
重复步骤 4,创建一个名为
RCTWebView.h的头文件。 -
将
RCTWebView.m重命名为RCTWebView.mm,使其成为 Objective-C++ 文件。
Podfile
...
Demo
├── AppDelegate.swift
...
├── RCTWebView.h
└── RCTWebView.mm
创建完头文件和实现文件后,即可开始编写实现代码。
下面是 RCTWebView.h 文件的代码,声明了组件接口。
#import <React/RCTViewComponentView.h>
#import <UIKit/UIKit.h>

NS_ASSUME_NONNULL_BEGIN

@interface RCTWebView : RCTViewComponentView

// 这里声明你希望从视图访问的原生方法

@end

NS_ASSUME_NONNULL_END
该类定义了一个继承自 RCTViewComponentView 的 RCTWebView。RCTViewComponentView 是所有原生组件的基类,由 React Native 提供。
以下是实现文件 (RCTWebView.mm) 的代码:
#import "RCTWebView.h"

#import <react/renderer/components/AppSpec/ComponentDescriptors.h>
#import <react/renderer/components/AppSpec/EventEmitters.h>
#import <react/renderer/components/AppSpec/Props.h>
#import <react/renderer/components/AppSpec/RCTComponentViewHelpers.h>
#import <WebKit/WebKit.h>

using namespace facebook::react;

@interface RCTWebView () <RCTCustomWebViewViewProtocol, WKNavigationDelegate>
@end

@implementation RCTWebView {
  NSURL * _sourceURL;
  WKWebView * _webView;
}

-(instancetype)init
{
  if(self = [super init]) {
    _webView = [WKWebView new];
    _webView.navigationDelegate = self;
    [self addSubview:_webView];
  }
  return self;
}

- (void)updateProps:(Props::Shared const &)props oldProps:(Props::Shared const &)oldProps
{
  const auto &oldViewProps = *std::static_pointer_cast<CustomWebViewProps const>(_props);
  const auto &newViewProps = *std::static_pointer_cast<CustomWebViewProps const>(props);

  // 在这里处理你的属性
  if (oldViewProps.sourceURL != newViewProps.sourceURL) {
    NSString *urlString = [NSString stringWithCString:newViewProps.sourceURL.c_str() encoding:NSUTF8StringEncoding];
    _sourceURL = [NSURL URLWithString:urlString];
    if ([self urlIsValid:newViewProps.sourceURL]) {
      [_webView loadRequest:[NSURLRequest requestWithURL:_sourceURL]];
    }
  }

  [super updateProps:props oldProps:oldProps];
}

-(void)layoutSubviews
{
  [super layoutSubviews];
  _webView.frame = self.bounds;

}

#pragma mark - WKNavigationDelegate

-(void)webView:(WKWebView *)webView didFinishNavigation:(WKNavigation *)navigation
{
  CustomWebViewEventEmitter::OnScriptLoaded result = CustomWebViewEventEmitter::OnScriptLoaded{CustomWebViewEventEmitter::OnScriptLoadedResult::Success};
  self.eventEmitter.onScriptLoaded(result);
}

- (BOOL)urlIsValid:(std::string)propString
{
  if (propString.length() > 0 && !_sourceURL) {
    CustomWebViewEventEmitter::OnScriptLoaded result = CustomWebViewEventEmitter::OnScriptLoaded{CustomWebViewEventEmitter::OnScriptLoadedResult::Error};

    self.eventEmitter.onScriptLoaded(result);
    return NO;
  }
  return YES;
}

// 事件触发器便捷方法
- (const CustomWebViewEventEmitter &)eventEmitter
{
  return static_cast<const CustomWebViewEventEmitter &>(*_eventEmitter);
}

+ (ComponentDescriptorProvider)componentDescriptorProvider
{
  return concreteComponentDescriptorProvider<CustomWebViewComponentDescriptor>();
}

@end
这段代码使用 Objective-C++ 编写,包含多个细节:
@interface实现了两个协议:- 由 Codegen 生成的
RCTCustomWebViewViewProtocol; - 由 WebKit 框架提供的
WKNavigationDelegate,用于处理 WebView 导航事件;
- 由 Codegen 生成的
init方法实例化WKWebView,添加为子视图并设置navigationDelegate;updateProps方法由 React Native 在组件属性变化时调用;layoutSubviews方法描述自定义视图的布局方式;webView:didFinishNavigation:方法处理WKWebView页面加载完成时的操作;urlIsValid:(std::string)propString方法检查传入属性的 URL 是否有效;eventEmitter方法用于获取强类型的事件触发器实例;componentDescriptorProvider返回由 Codegen 生成的ComponentDescriptor;
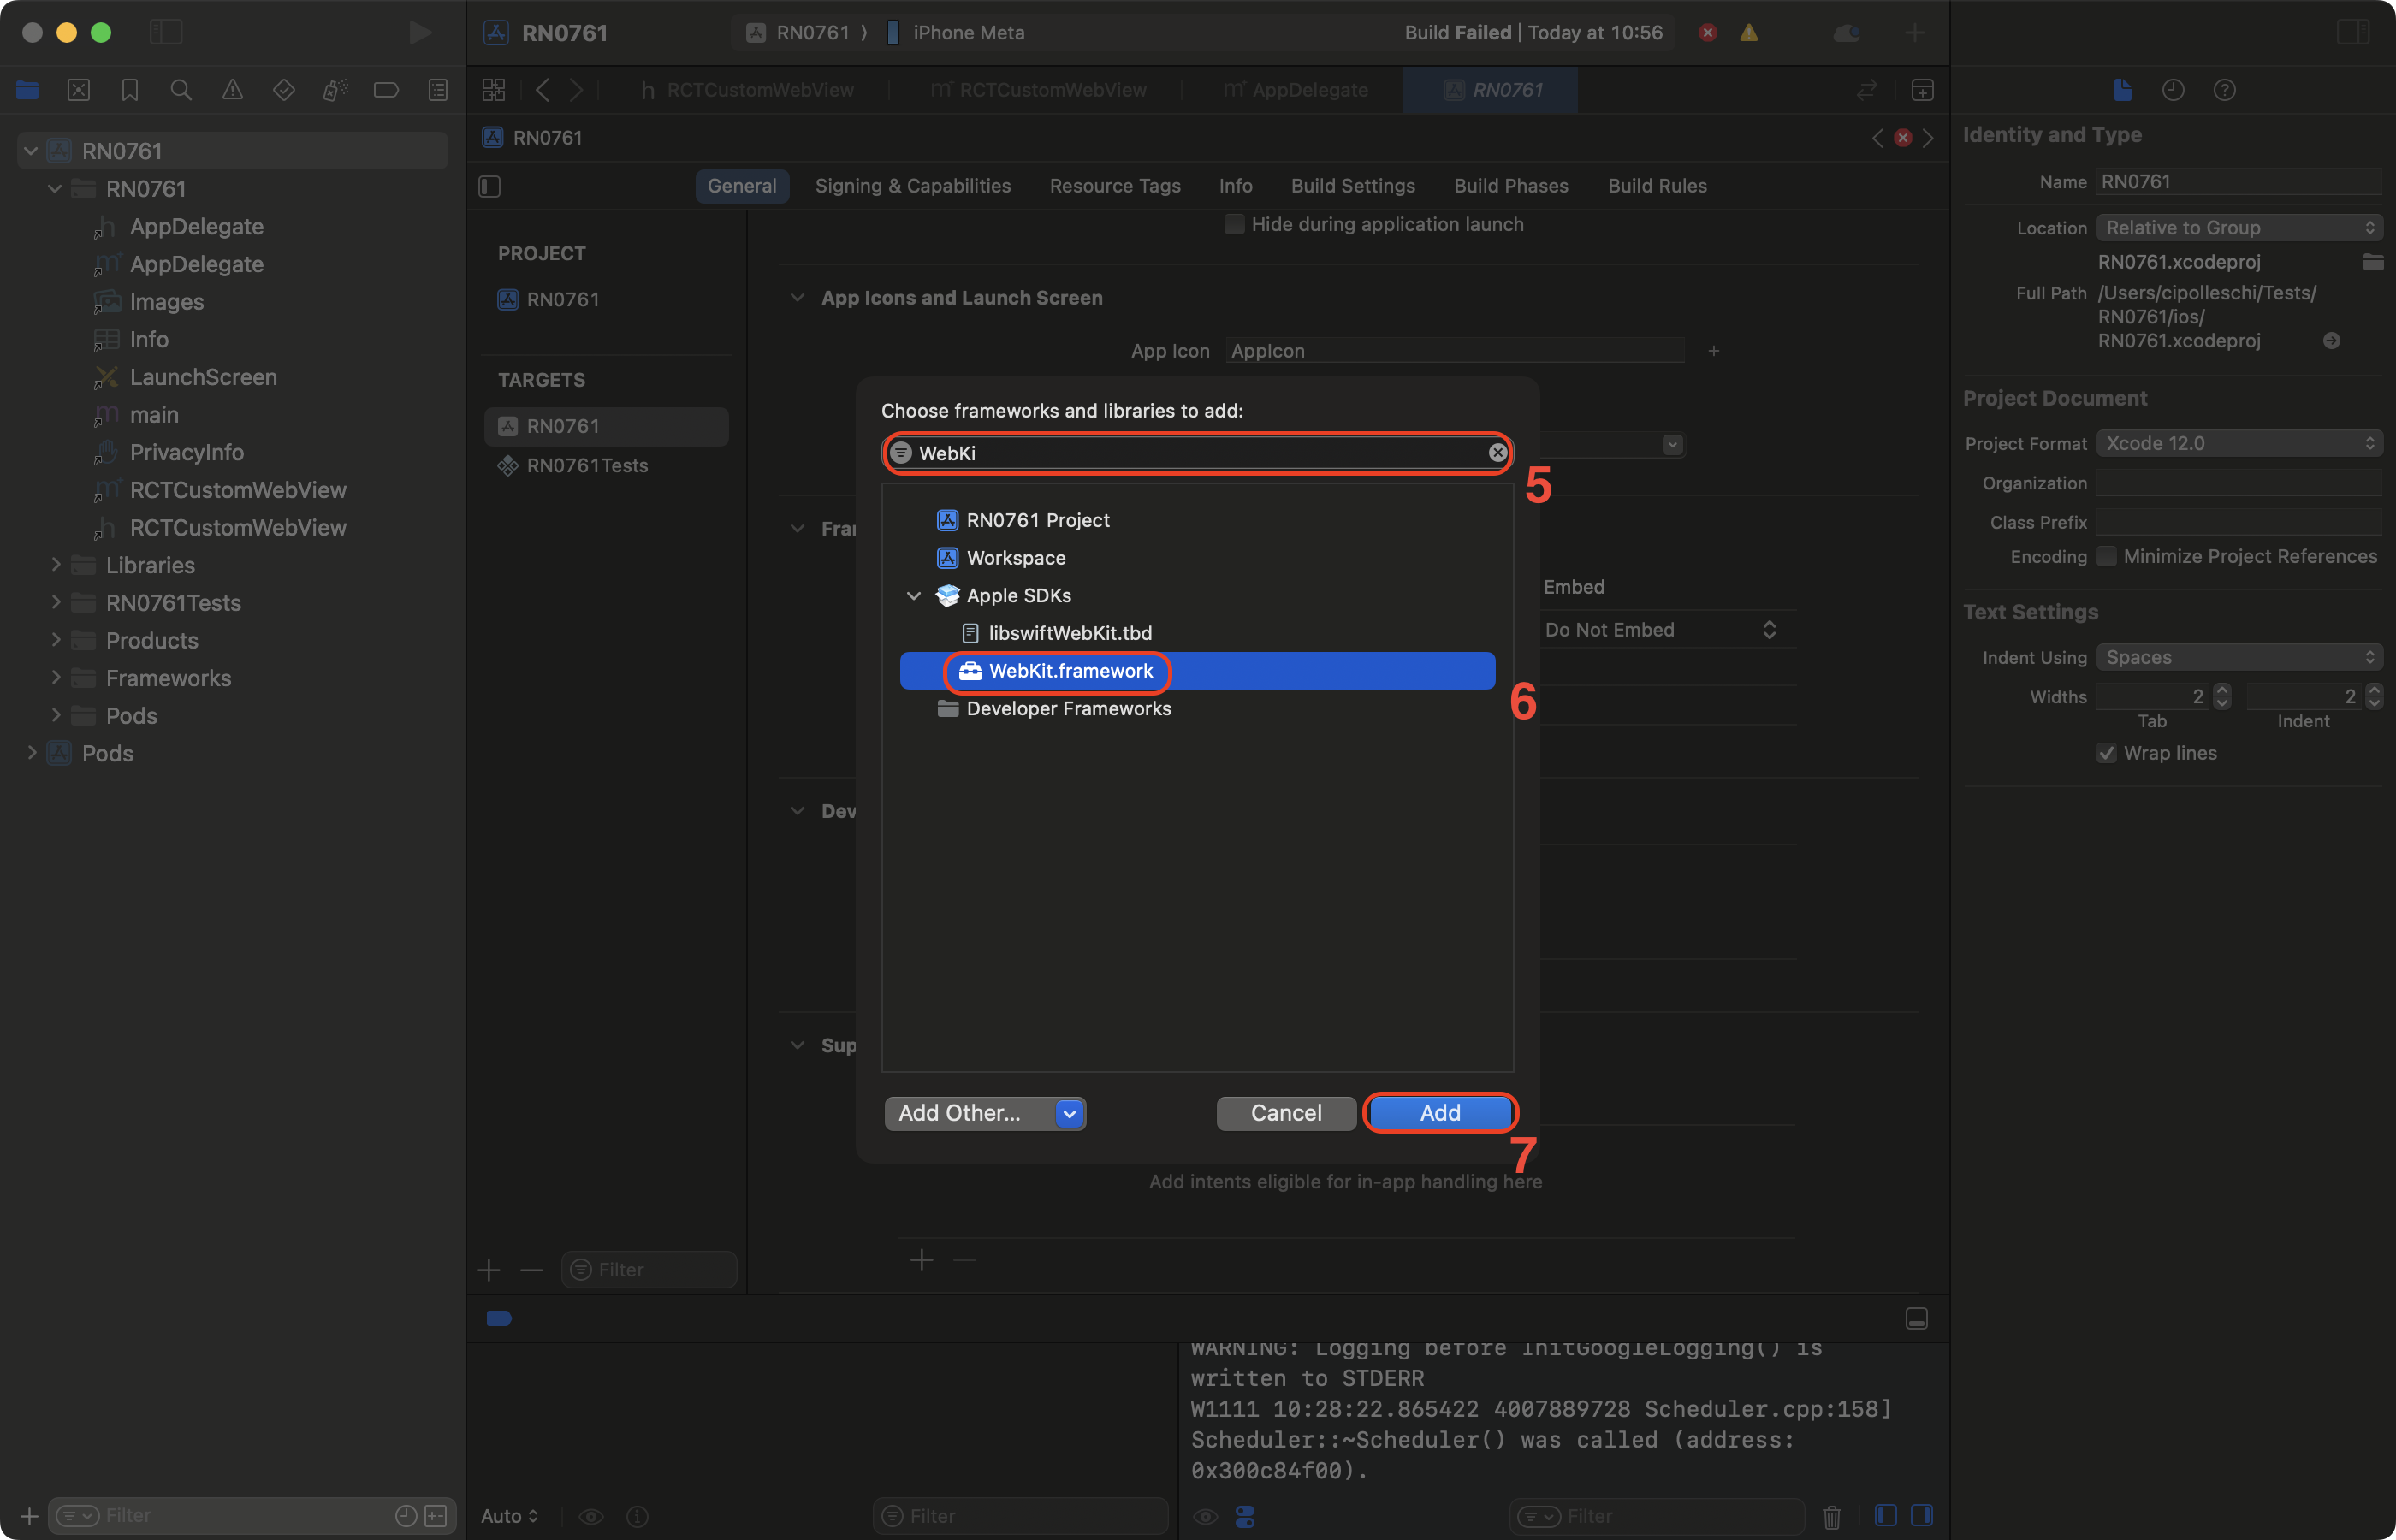
添加 WebKit 框架
这一步只有在我们创建 Web 视图时需要。iOS 上的 Web 组件需要链接 Apple 提供的 WebKit 框架。如果你的组件不需要访问特定 Web 功能,可以跳过此步骤。
Web 视图需要访问 Apple 通过 Xcode 和设备带来的框架之一 —— WebKit。你可以在原生代码中看到引入了 <WebKit/WebKit.h>。
要在你的应用中链接 WebKit 框架,请按下列步骤操作:
- 在 Xcode 中点击你的项目。
- 选择应用目标(app target)。
- 选择 General 选项卡。
- 向下滚动,找到 "Frameworks, Libraries, and Embedded Contents" 区域,然后点击
+按钮。
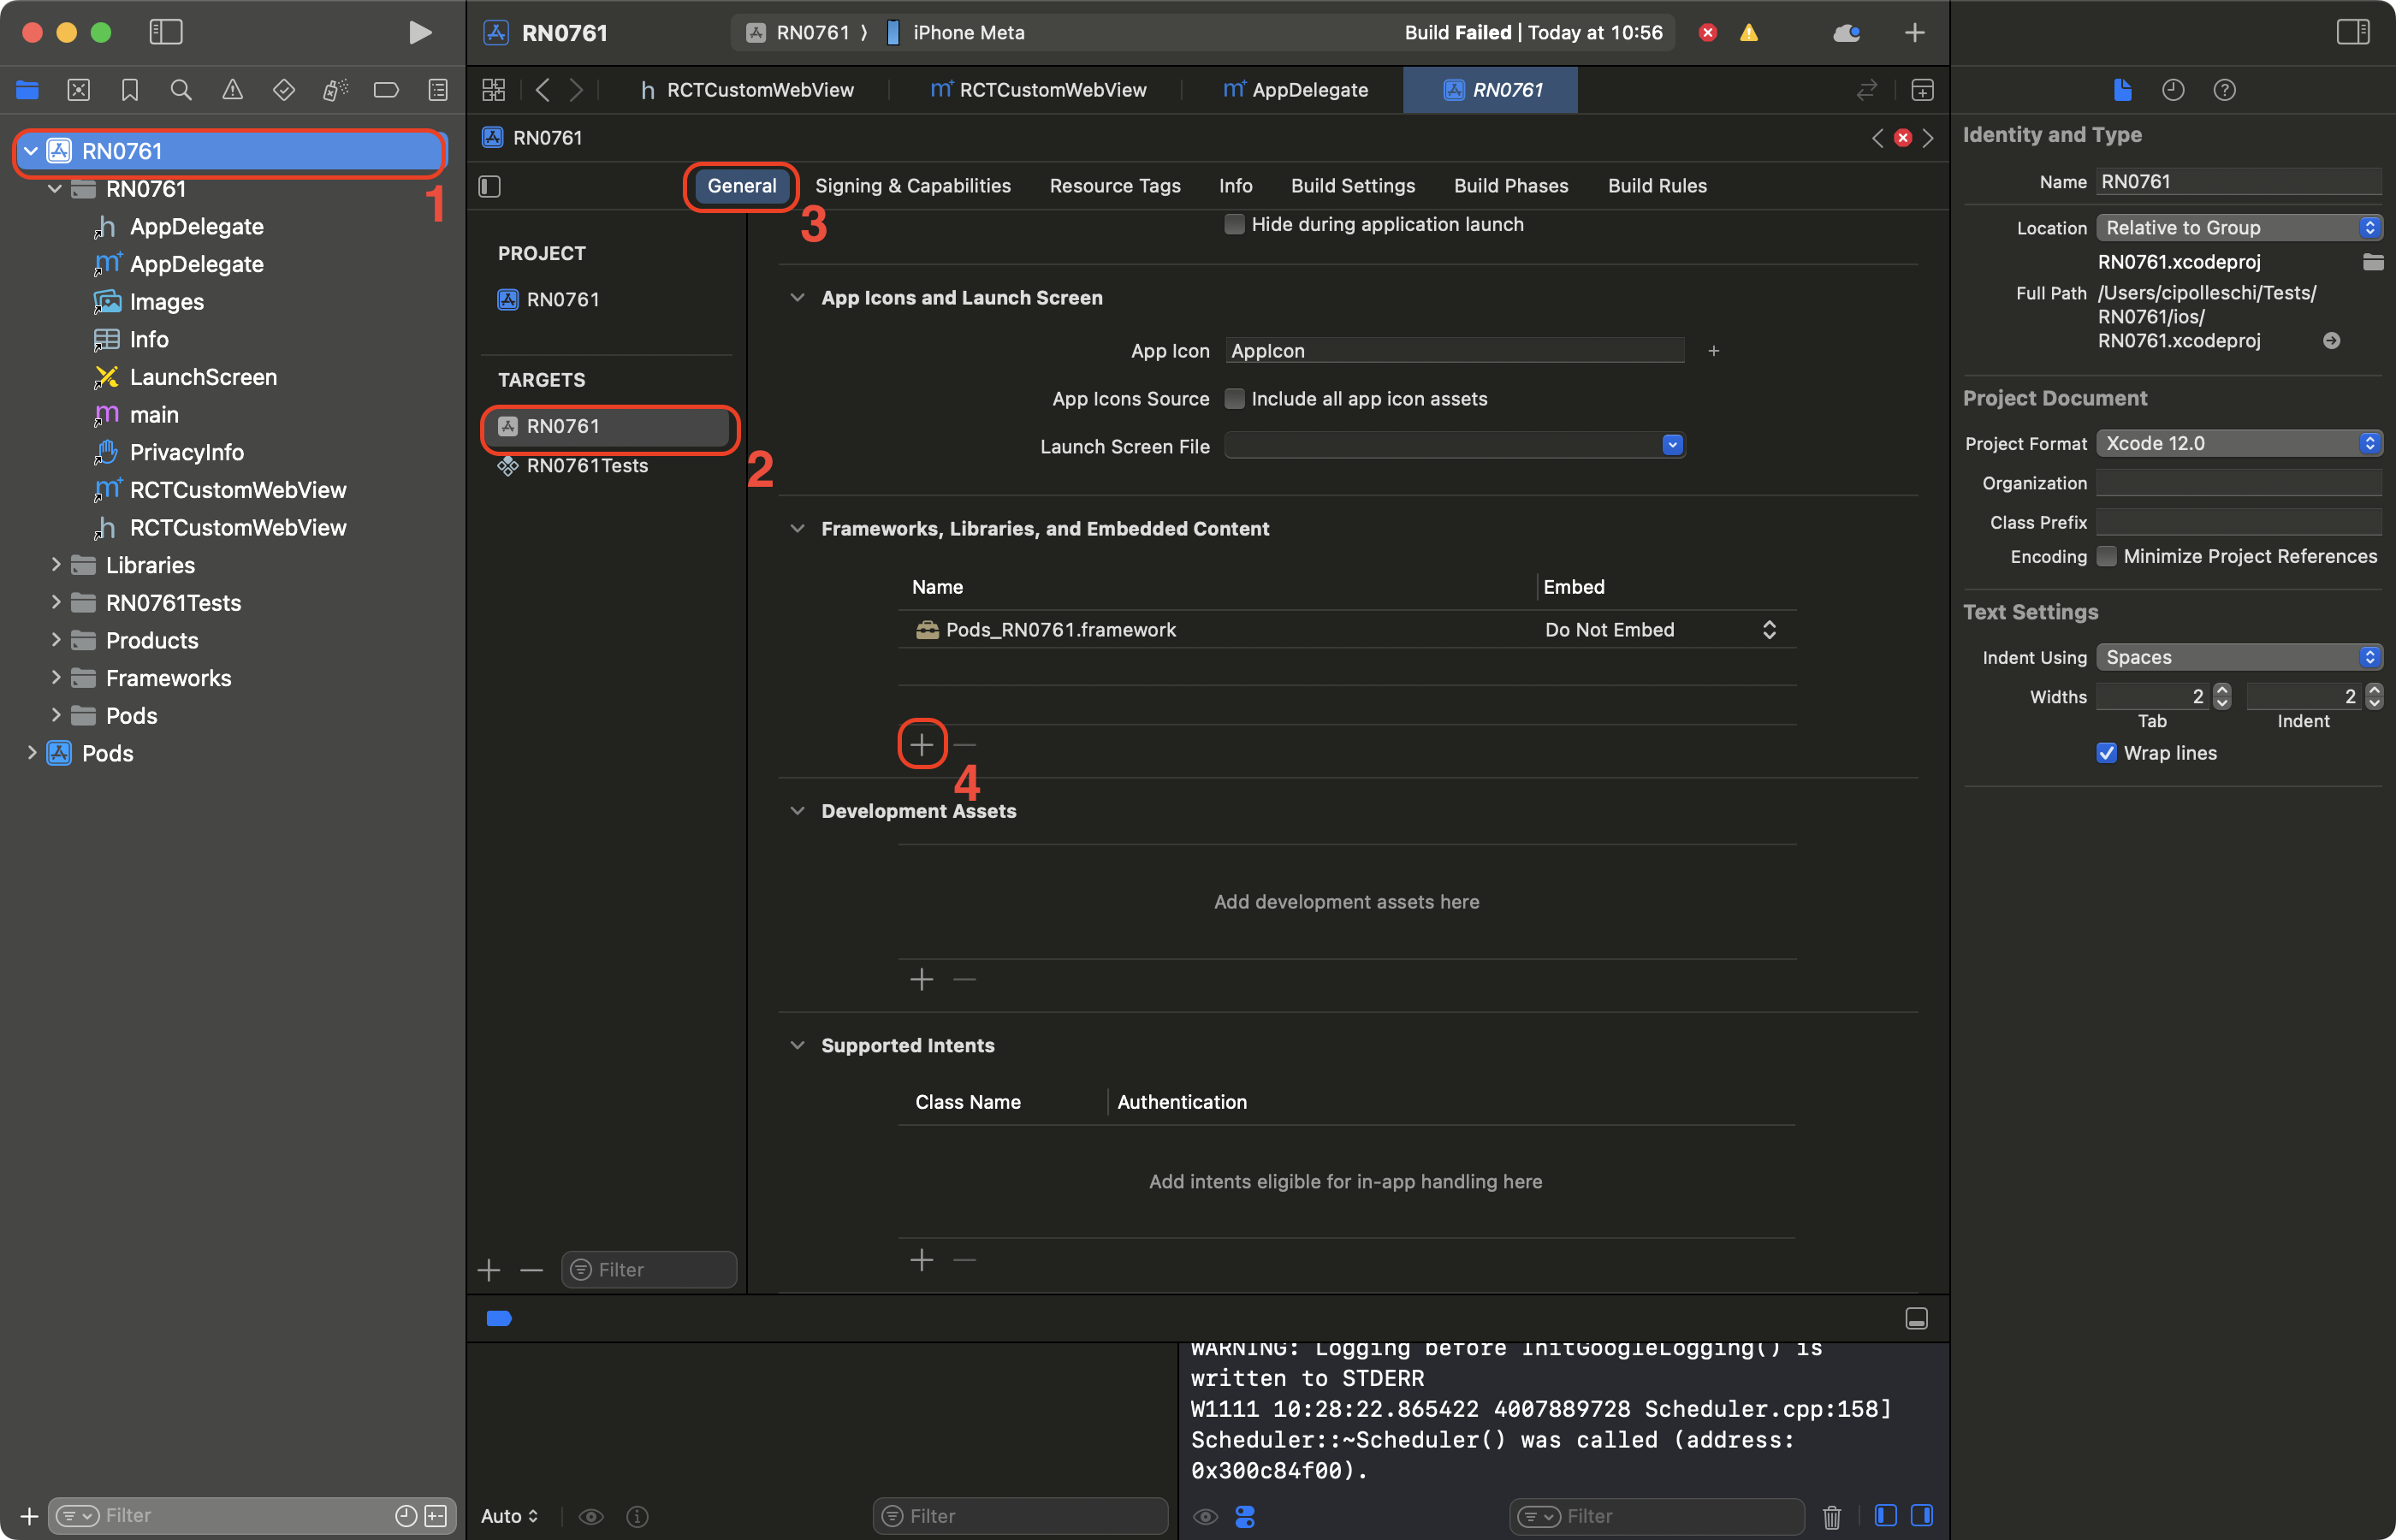
- 在搜索栏中输入 WebKit 进行筛选。
- 选择 WebKit 框架。
- 点击添加。